Ruled surface requires two sections and only two
sections. The result uses a lofting technique from one section to the
other.
2) Through Curves 
Through Curves requires a
minimum of two sections, but can have more than two. This is a lofting
technique that can do more than two sections.
3) Through Curves Mesh 
Through Curves Mesh
requires a minimum of two sections, but can have more than two. It also
requires a minimum of two cross curves, but can have more than two. Cross
curves are typically defined in the perpendicular direction to the section
inputs. This technique lofts from section to section and applies the
cross curve definitions in the other direction. The cross curves must be
connected to the sections.
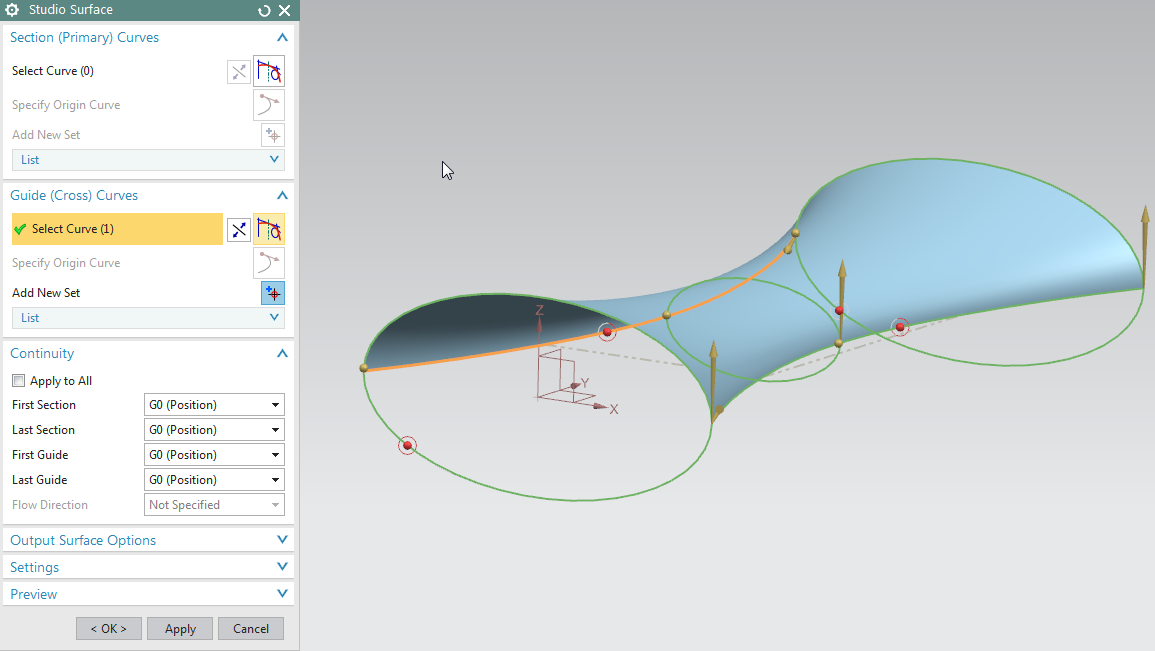
4) Studio Surface 
Studio Surface is similar
to Through Curves Mesh as far as definition. It produces swept for lofted
features from a network of section strings, or a network of section strings and
up to three guide strings. It requires at least two inputs. It can
be two sections or one section and one guide/cross curve at minimum.
Studio Surface also has some other options for flexibility within the
feature. Studio Surface can create lofted shapes or swept shapes within
the same command. Studio Surface also previews as soon at two inputs are
defined. The cross curves do not have to be connected to the cross
sections to get a result.
Studio Surface has an
option called "Switch Strings" which can toggle your U and V line
definition curves:
5) Sweep Along Guide 
Sweep Along Guide requires
one section and one guide curve. It takes the section and sweeps it down
the guide definition.
6) Tube 
Tube just needs a path
definition. The cross section is determined to be circular with tube
parameters included.
7) Swept
Swept takes a cross section
definition and sweeps it along a path. It can have multiple sections but
only up to three guide strings. In the screen shot below, the section and
guide curve is not connected. They do not need to be connected for the
swept algorithm.
8) Variational Sweep 
Variational Sweep takes a
profile and sweeps it between two curves or surface edges. Because it is
a sweep, the sketch section is created with the on path option. How the
sketch is connected to the surface edges/curves determines its sweep
path. It varies as it transitions between the input curves. You can
sweep faces that are coincident, tangent, or normal to other curves and faces,
add secondary sections to vary dimensions at specific locations, or extend the
body beyond the length of the path or limit it.
In this Ally PLM Tip
of the Week, we took a look at some of the requirements for the different
surfacing tools. This information can help you pick the proper feature
for your desired surface requirement.
Brandon Carter
Senior Application Engineer
Ally PLM Solutions, Inc.
Want more tips? Sign up HERE
to receive our Tip of the Week.
|


No comments:
Post a Comment