NX Tip
of the Week
March
20, 2015
|
NX -
Ordinate Dimensioning in NX Modeling and Reusing it in Drafting
|
Today I will explain how to create ordinate dimensions within NX
Modeling. I will also show how to reuse the dimensions in Drafting.
Result in Drafting
Environment -
- To get started, make sure the PMI option is turned ON. By default, it is turned OFF
- Set the Model View to Work:
With Single Dimension, use Select Origin where you pick any point. This is going to be the origin of the ordinate dimension.
I have selected the single dimension option to help pick one hole at a time:
Start by picking the center of the holes and place them one at a time:
Now let's look at the Multiple Selection option. With Multiple Dimension, I can pick all the holes at once.
Change the option to Multiple Dimension and pick the origin:
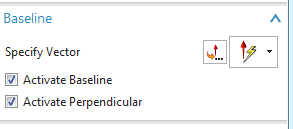
Set the Baseline option:
Before I start selecting the holes, the margins need to be defined. Click on the Define Margins command:
Here are the options I selected for this example:
Select the bottom left corner point as the origin:
Follow the same procedure to get a horizontal margin:
Baseline option step:
Select all the holes by clicking on the center point of the circular edge.
Result:
Save the Model file.
Switch to the Drafting application and place the top model view on the sheet:
After placing the view, go to View Settings:
Make sure to change the settings to From Model View, click Apply:
Final Result:
Navjot Gill
Application Engineer
Ally PLM Solutions, Inc.
Want
more tips? Sign up HERE
to receive our Tip of the Week.
|


No comments:
Post a Comment